Watercolor Tutorial - How to Paint Cars
Jan 27, 2025Today I'm going to demonstrate how to paint this scene. As I show you this step-by-step tutorial, I'm going to cover some major concepts that will carry over to any scene you want to paint; I'll be talking about values, color mixing, and light.
So get your paints ready and let's go!
How to Paint Cars Awash with Morning Light
If you've followed me for any significant amount of time, you know that I love painting ordinary scenes. It's not always the grandeur of a scene that grabs my attention. Often it's something small - like shadow and light.
Compelling light can make any subject captivating. So that's why this ordinary house in my neighborhood made its way to my art studio.
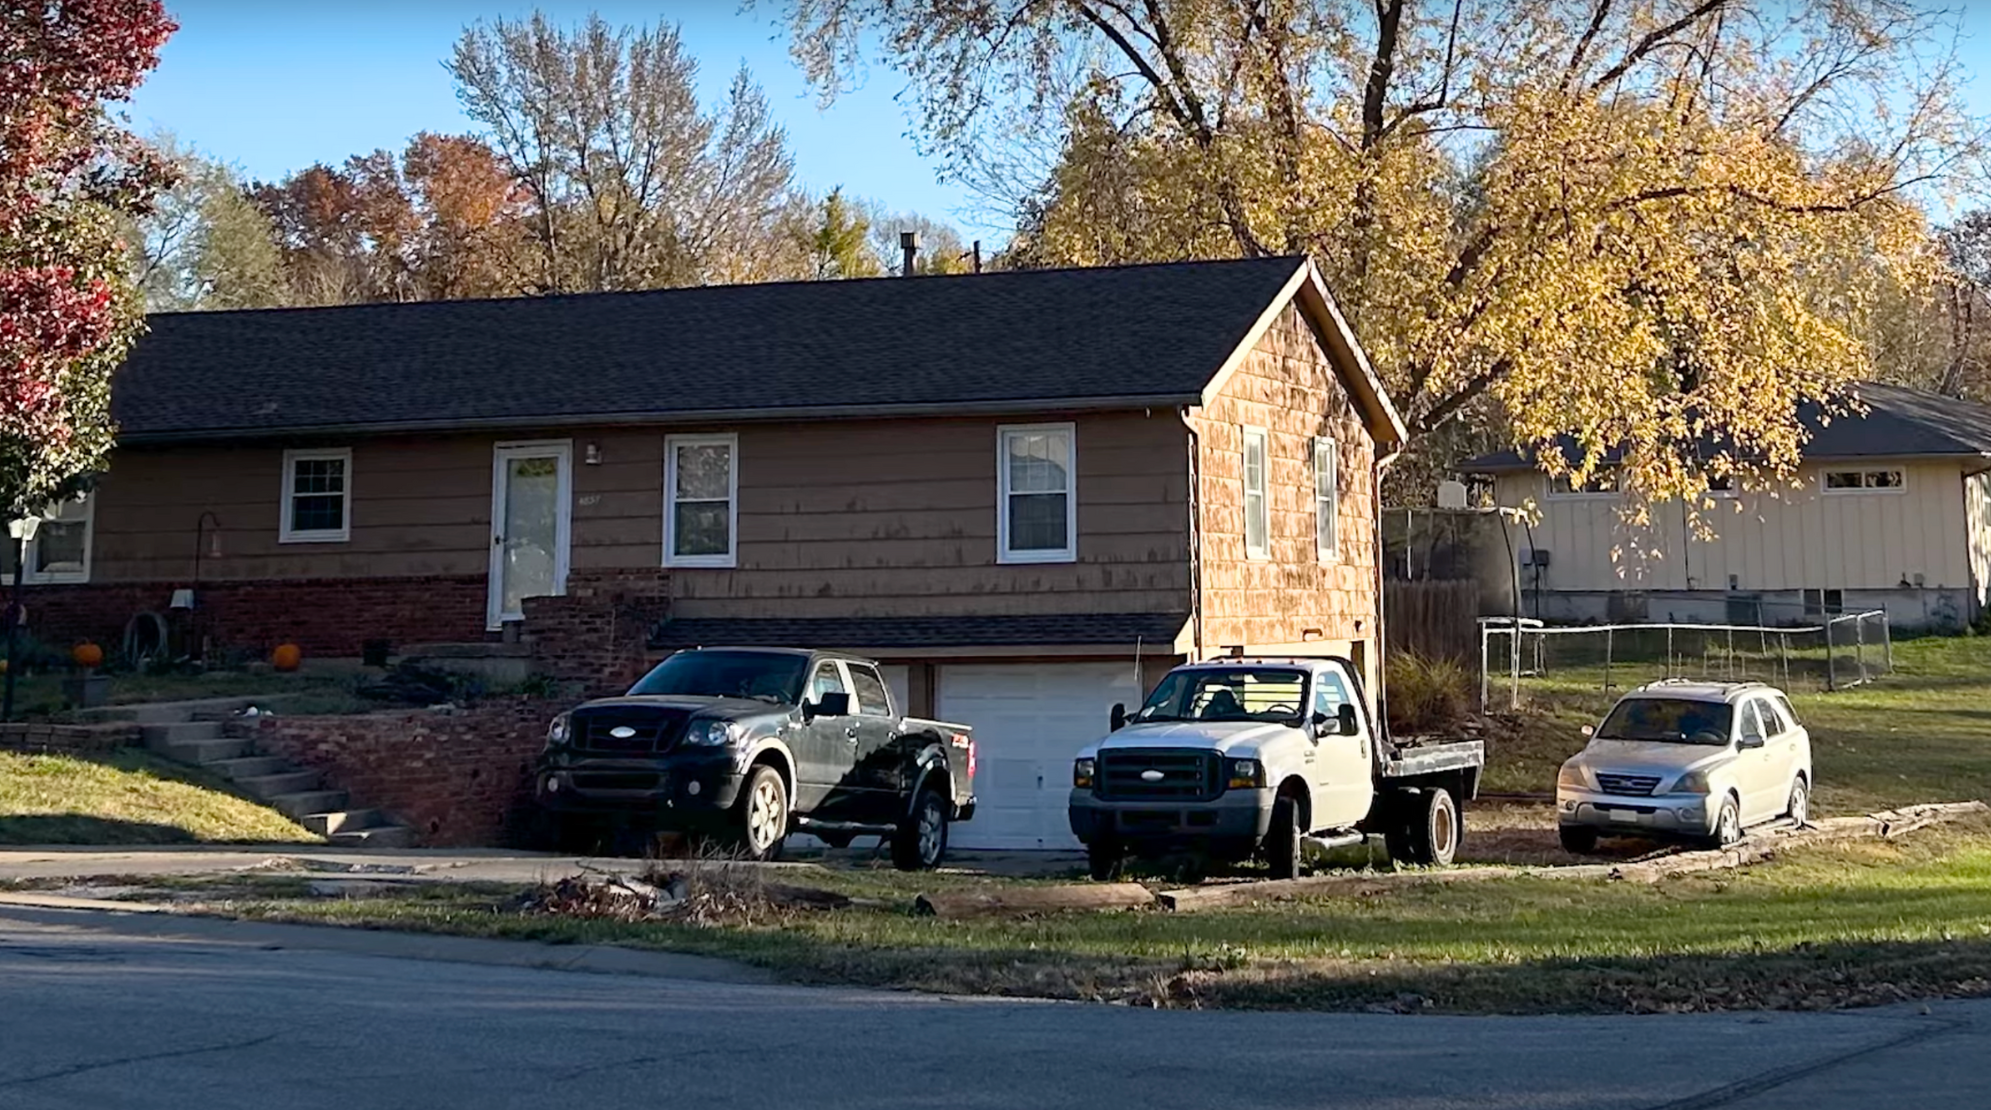
Let's talk about the 3-step process I used to paint this scene.
3-Step Watercolor Painting Process
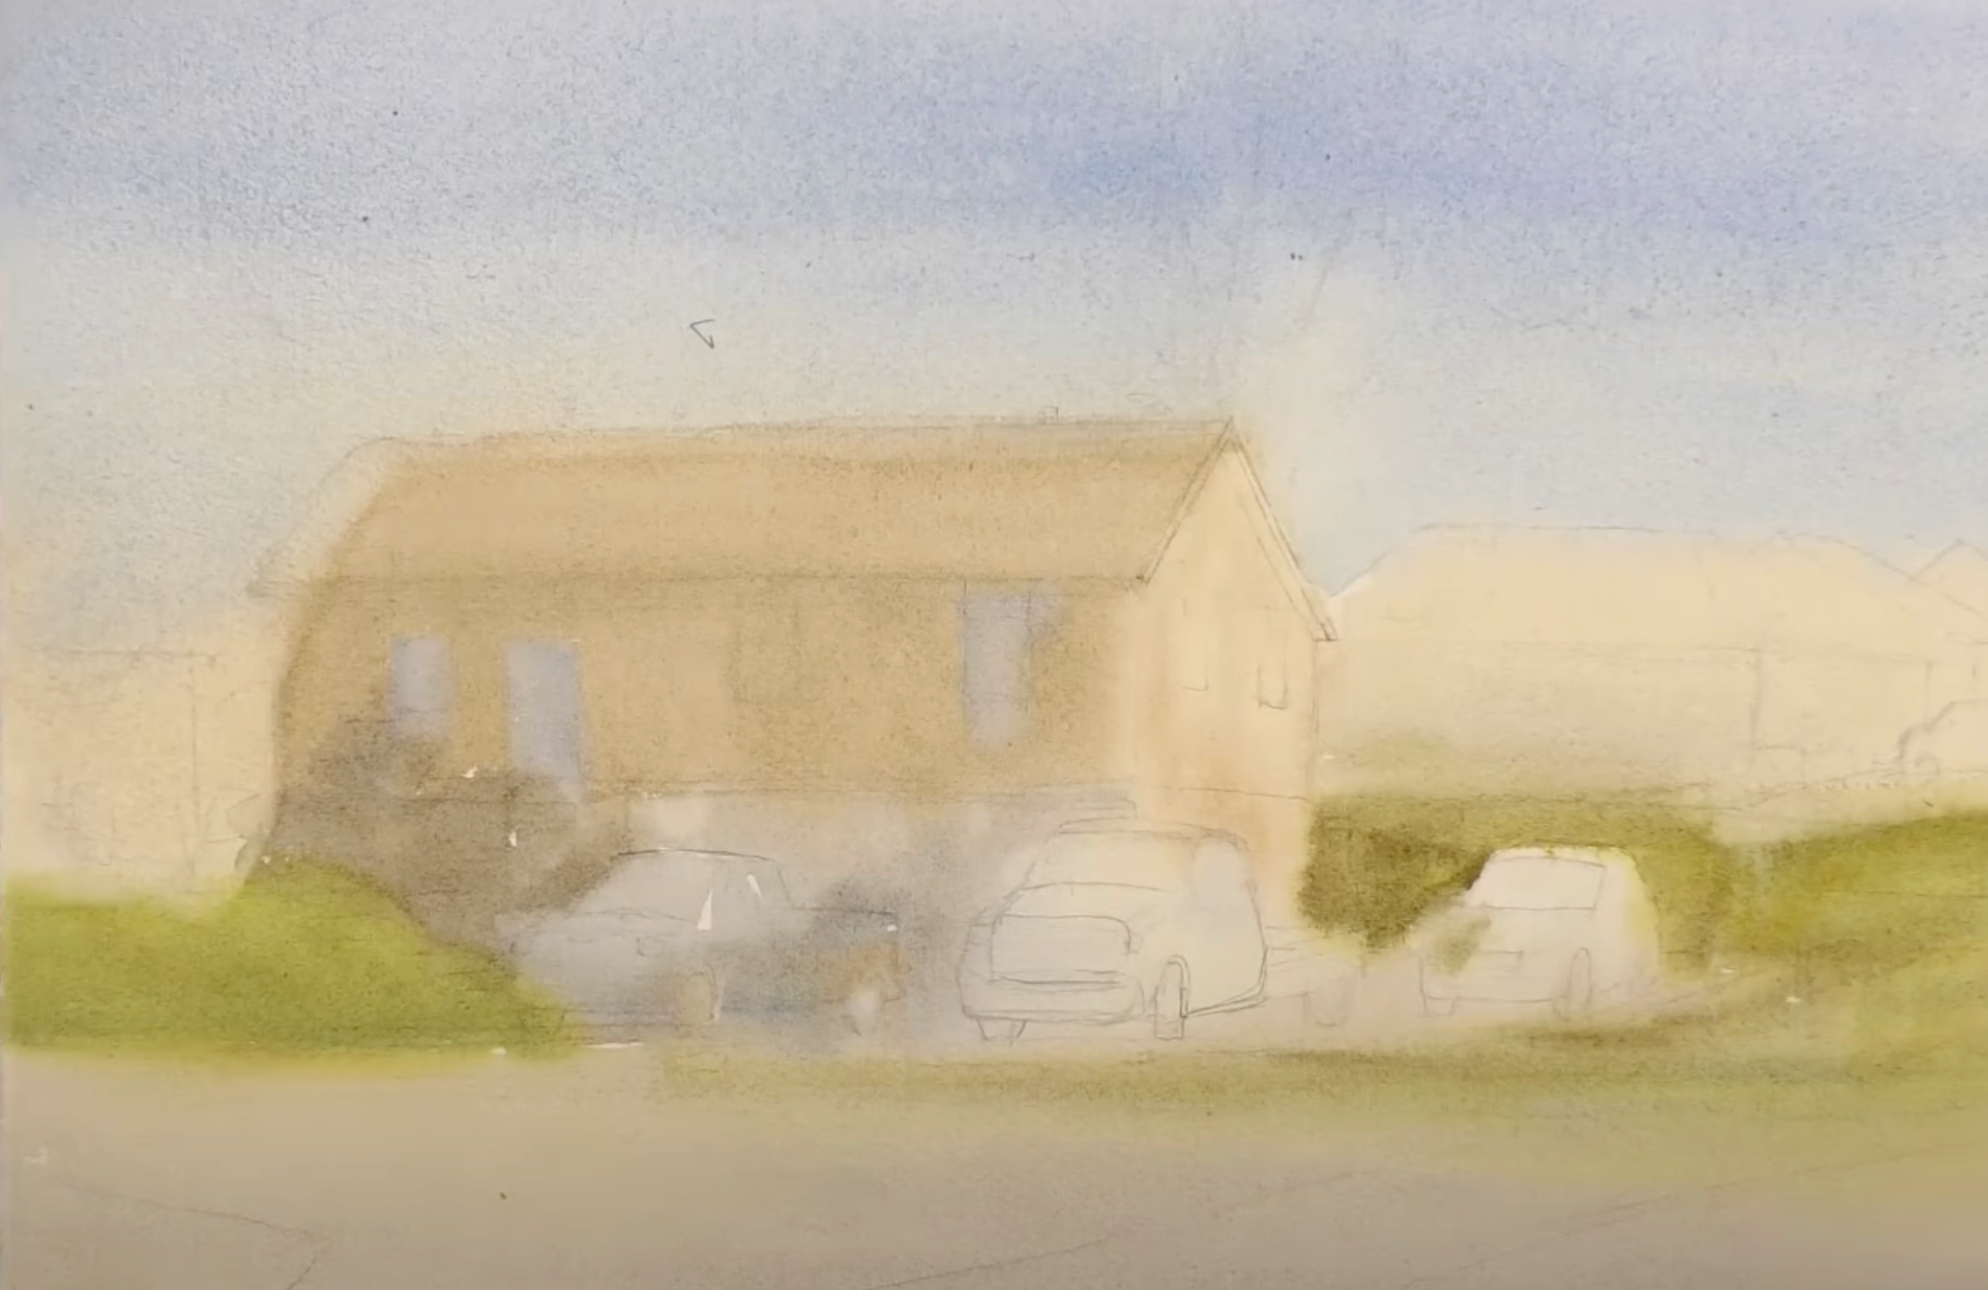
First Wash - Lightest Values
I cover this more thoroughly in the video above, but some things to keep in mind as you complete your first wash are:
- After drawing a detailed rendering like this one, brush an eraser over it lightly so the lines aren't too predominant in the scene.
- Avoid trying to get those middle values in this first wash. For example, I want the front of the house to be in shadow, so it's going to be darker. But I have to resist the urge to achieve this shadow now. This will come later.
- Mix up your pigments. Give the first wash some variation of color.
- Work from a wet edge to combine the colors and cover your whole paper (other than where you want to preserve the white of the paper).
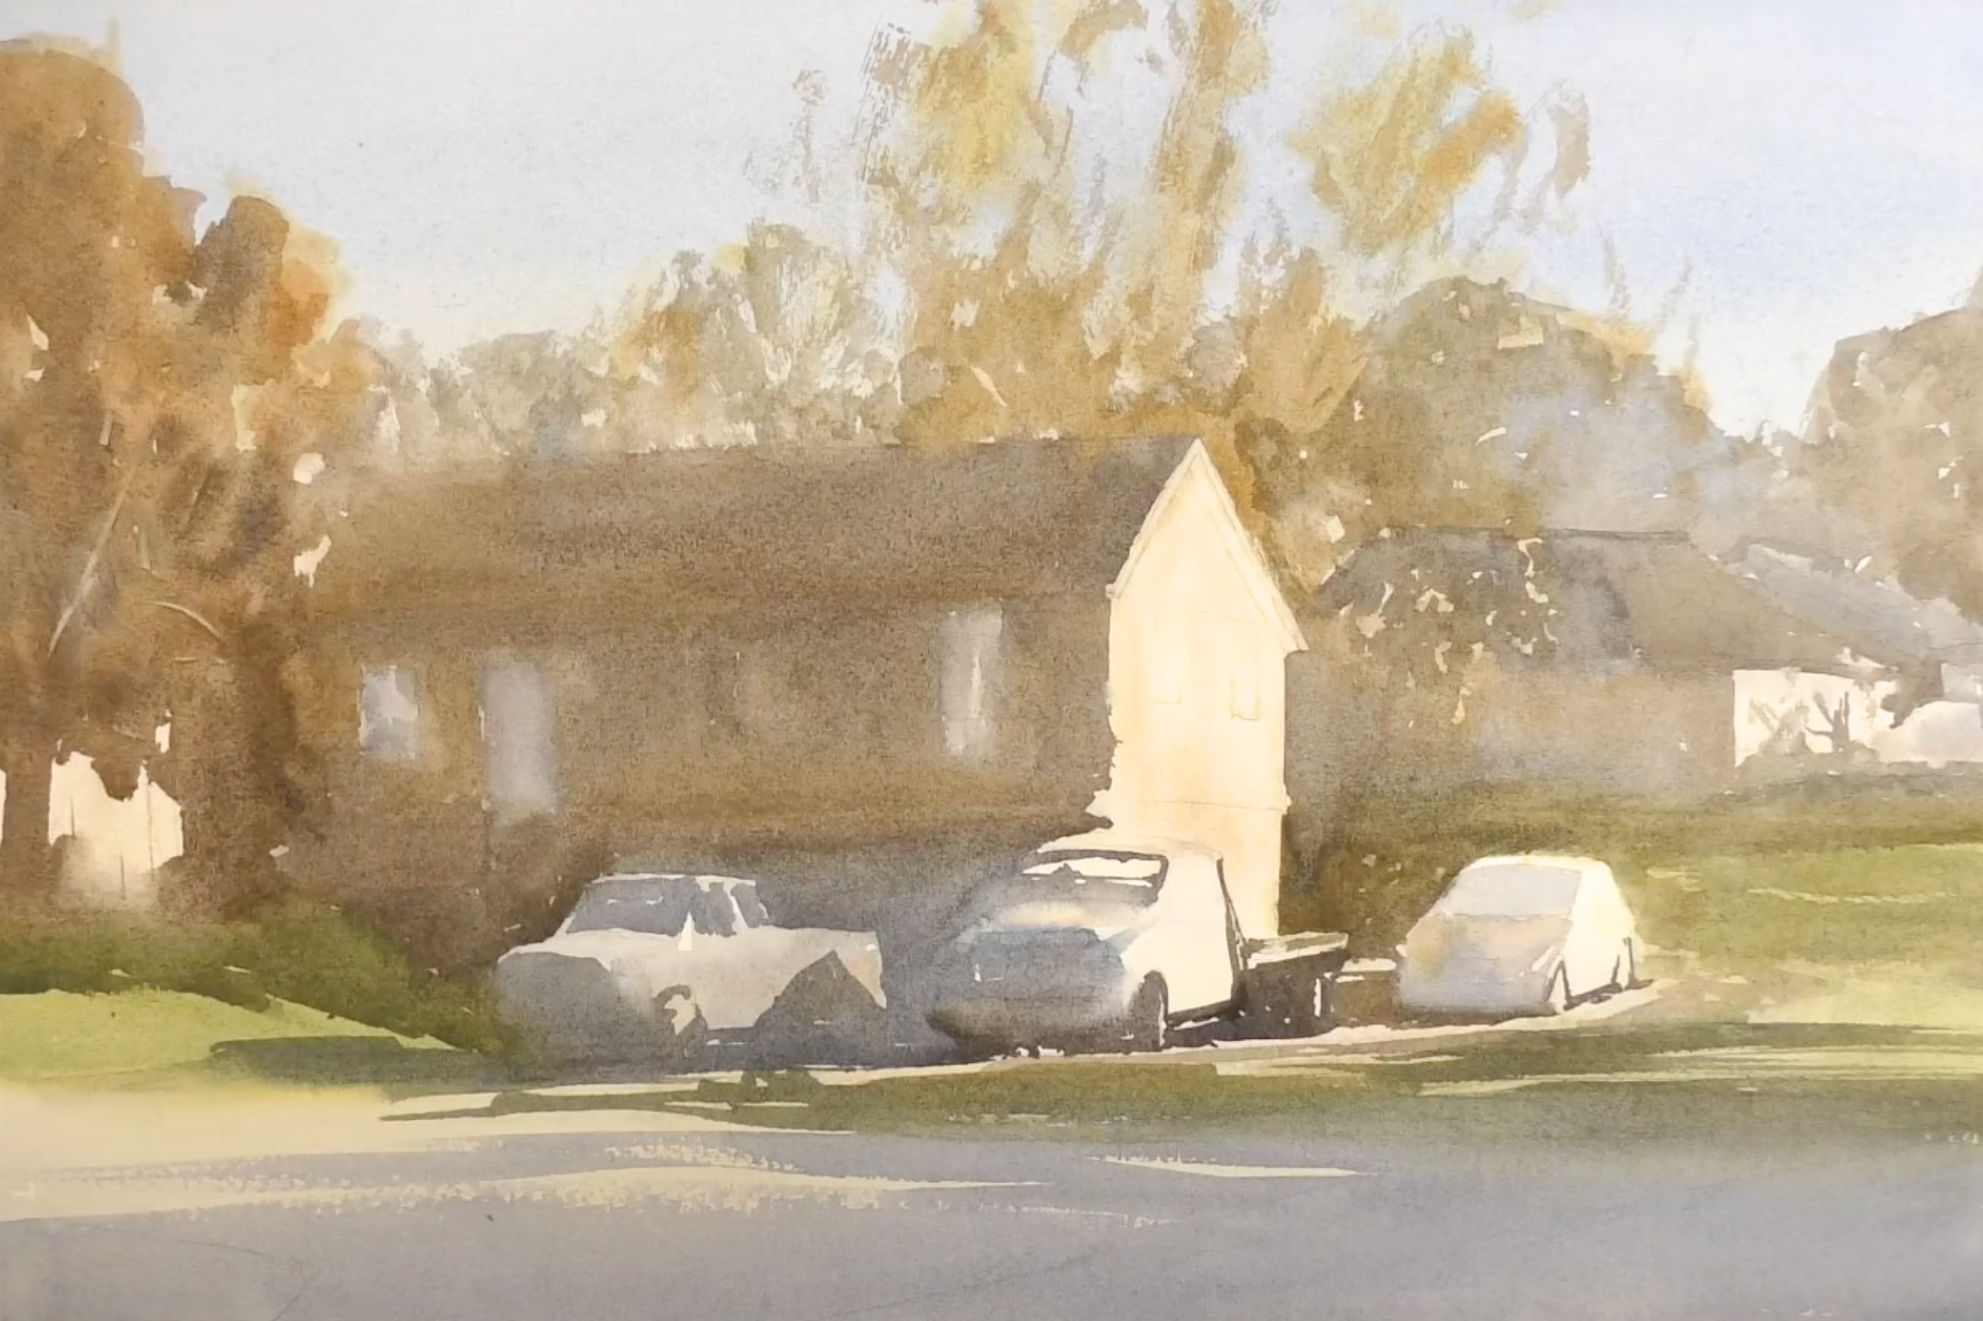
Second Wash - Connected Middle Shape
Some reminders for the second wash:
- Pick a path for your connected shape. For example, I am right-handed, so I often start at the left side and work my way right. This could change depending on the scene, though.
- Reload your brush often and work from a wet edge.
- Add in some variety of pigment in so that your colors are dynamic.
- Negatively paint around the areas you want to keep light.
- Always look for value connections between the subjects in your scene. This creates a more unified, interlocked painting.
- Let the colors mix on your paper - that's what watercolor does!
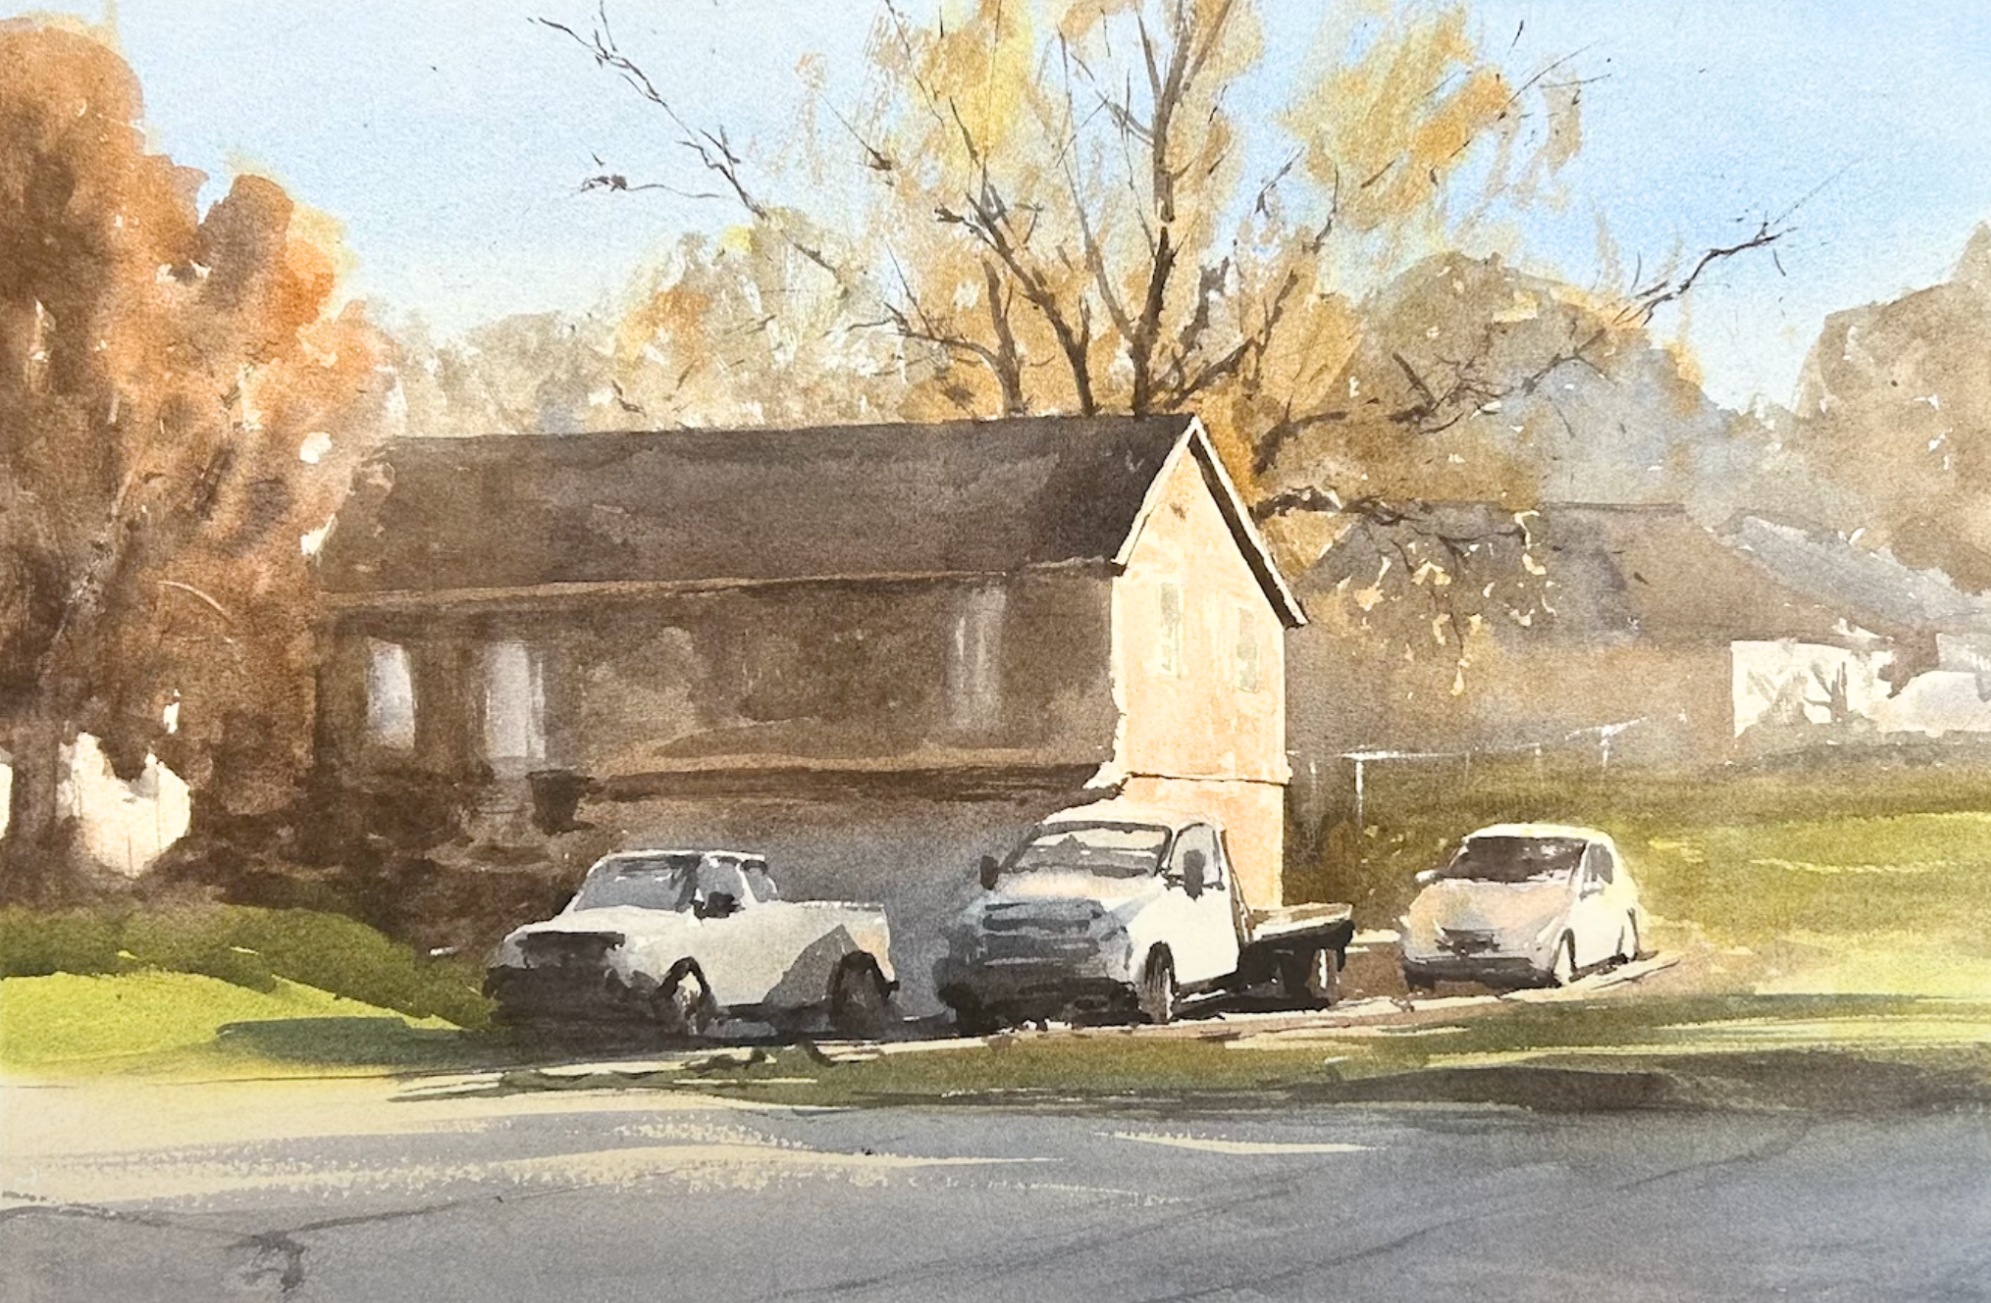
Third Wash - Darks and Details
Here's where everything comes into focus and where the light pops:
- Be cautious not to eliminate the freshness of the previous two steps
- Make sure you add shadows to cars. This grounds them and incorporates them into your scene.
- Make sure to add mirrors and wheel wells.
- Squint to see the shapes of the objects in your scene.
- Don't be afraid to add another wash to areas that need more value for the scene to really pop.
- Add texture in the middle ground to bring it into focus.
Follow Along and Paint this Scene
I hope that this helps you see that having a methodical approach, knowing what you need to paint first, second and third, can really help you create light in your scene.
Next week I'm going to be talking about social media in the world of art and the effect that has on artists. And it's something I've been thinking about for a while, and that video is coming out next Monday, so hit that subscribe button if you haven't done that already.
Related Blogs
A Simple Guide to Painting Cars in Watercolor
The Scratching Watercolor Technique for Beginners
How to Paint Cars in Watercolor
