Layers that will Give You Better Results
Jun 23, 2025It can test your patience when you've covered your paper but it looks like nothing. But when you're doing things right, the first wash looks muted and undefined, and the second looks murky. It isn't until the third wash that everything clicks.
Keep reading (or watch my video) to learn how to use layers to paint vibrant watercolor scenes.
See What Happens to Your Watercolors with 3 Washes
One of the most frequent pieces of advice that I give aspiring watercolor artists is:
Do not try to paint a full-fledged scene in one layer; instead, organize your work into 3 washes.
How do you do this? What is each layer for? Let me show you!
What to Focus on In Your First Wash (or Layer)
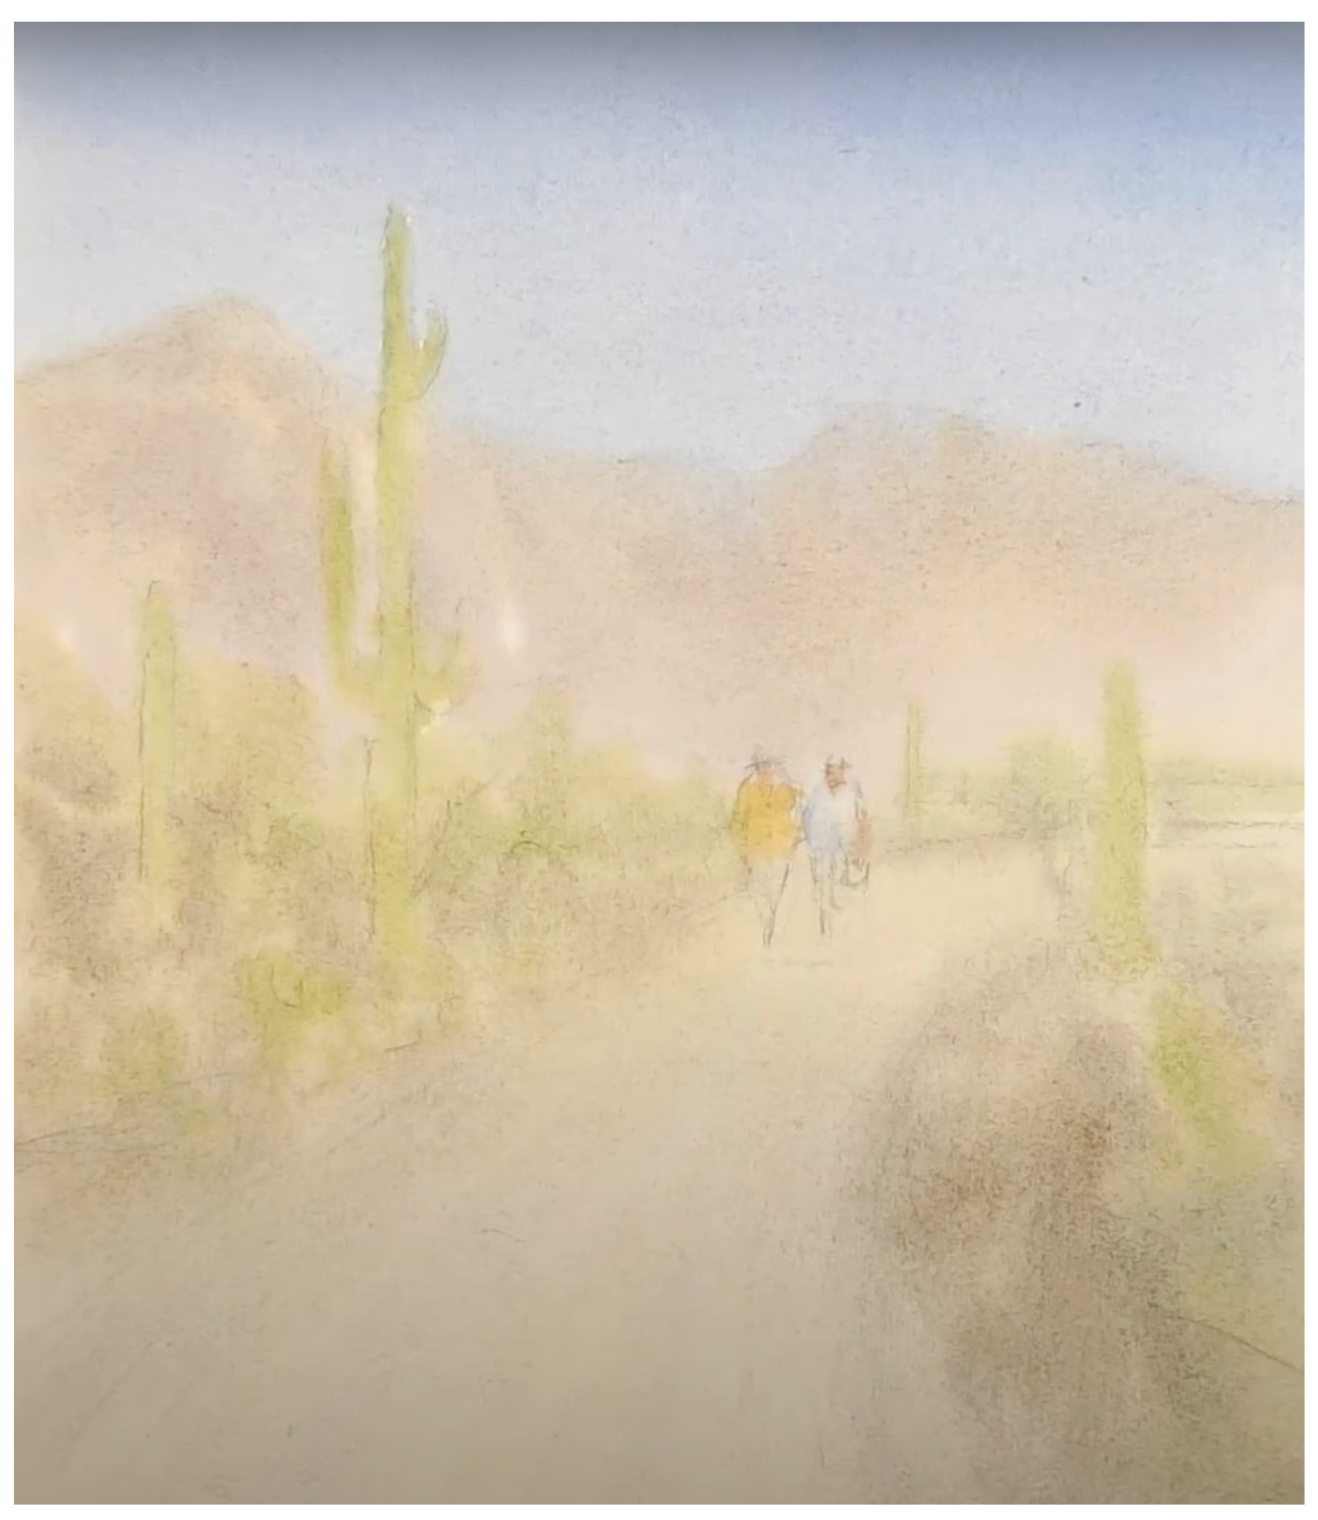
See what I mean about muted and undefined? This wash is not about painting a discernible scene. It's focus should be on laying in the lightest values, paying special attention to areas you want to preserve the white of the paper.
Remember that to paint a compelling and vibrant scene, you need a full spectrum of values. This first wash is your opportunity to achieve those light values. Without them, your painting will lack contrast and depth.
Another note on the first wash - do your best to mix up the colors you use. Notice how the mountain in the background is not just comprised of a single color, neither is the brush on the side of the walkway. It can be easy to rely on one single color, but it makes for a much more dynamic painting when you have colors running together a bit in this first wash.
How to Create a Successful Second Wash
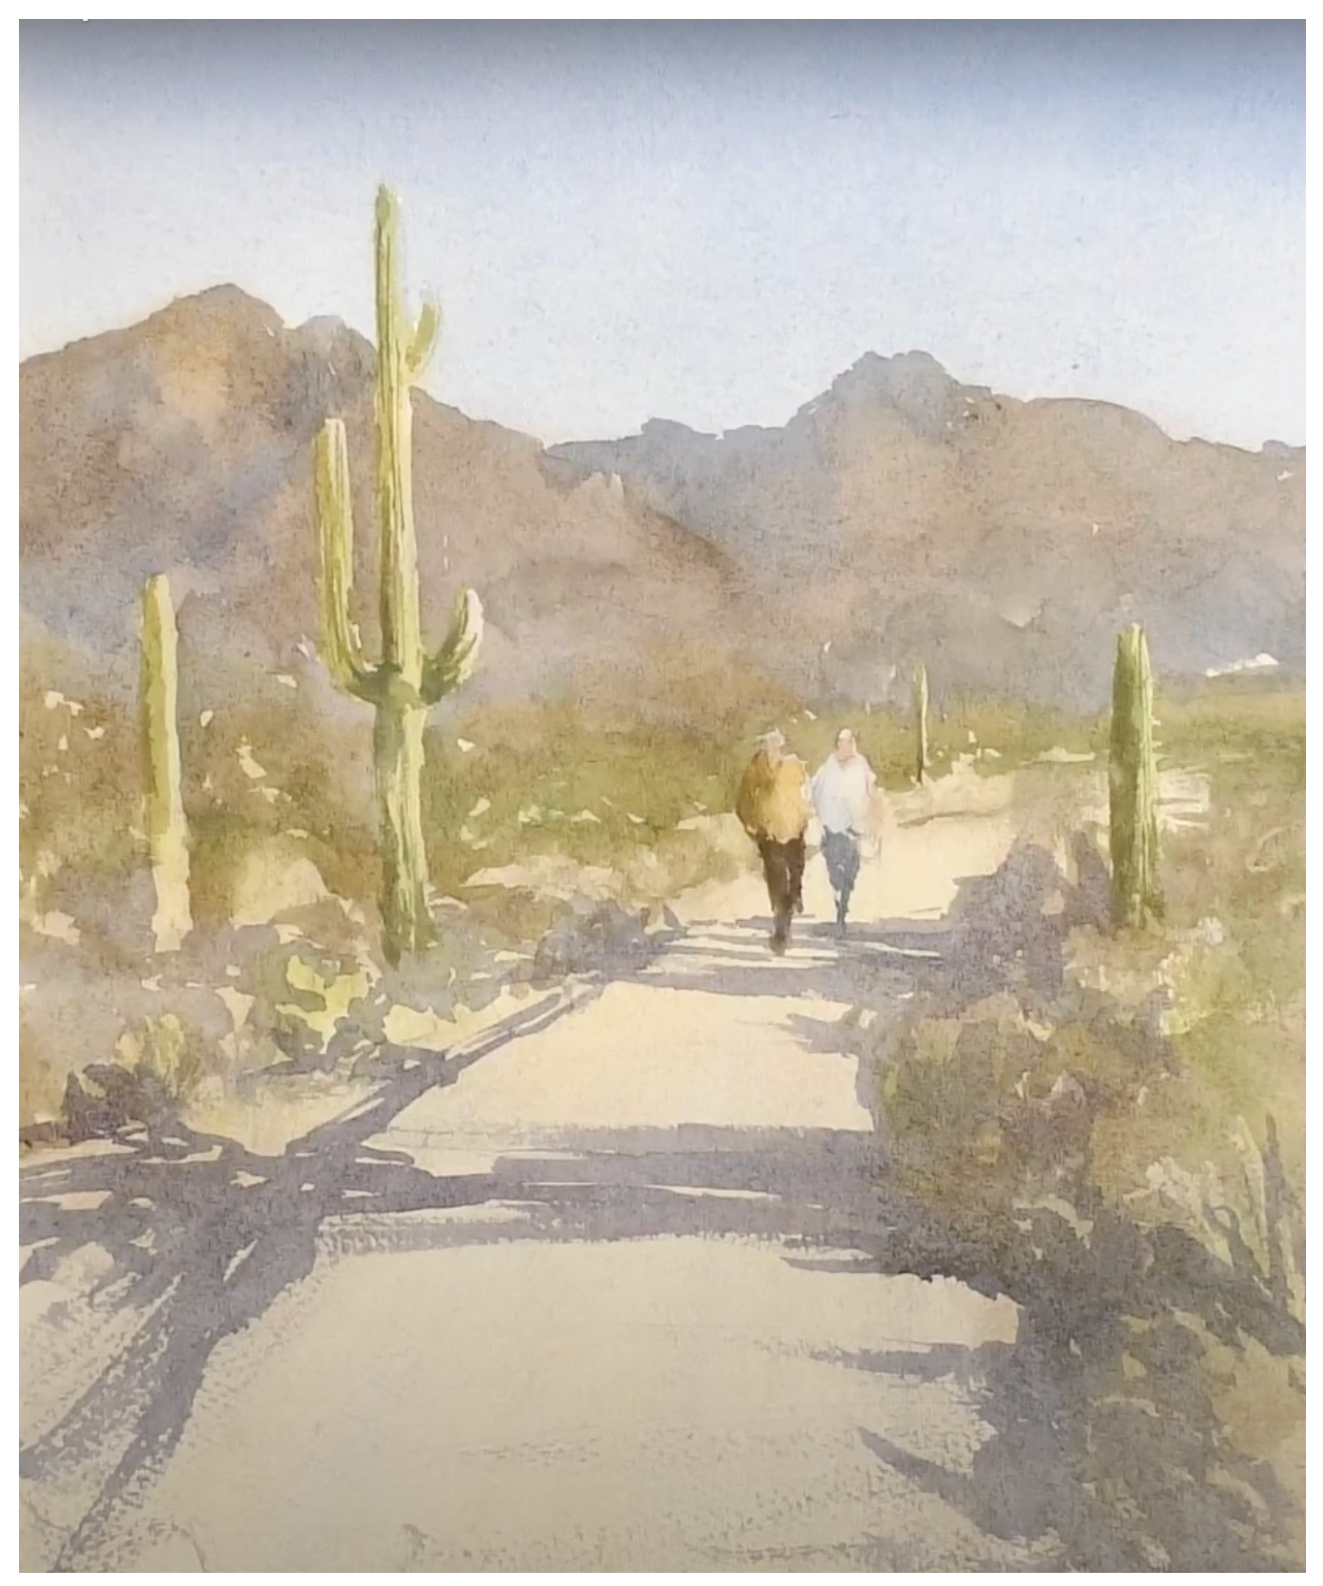
The second wash is all about connection. You're now using slightly darker values. With these middle values, your goal is to create a connecting shape throughout your painting.
This can be a difficult concept to learn, but if you study the photo above of my painting in progress, you'll notice that the middle values I've added bleed into one another from shape to shape, not matter the color and no matter what the colors are representing on the page. It's this connection that does the most to create a unified look to your scene.
Here are some simple strategies to help you with finding connection:
- Squint and simplify. Look at your reference photo and squint. This obscures some of the more obvious shapes in your subject and helps you to see the way the values connect.
- Turn your reference photo black and white. Sometimes values are difficult to discern. Turning your photo black and white can make this much more obvious. When you more clearly see the values, you can more clearly see the shape of the middle values.
- Work from the wet edge. When I paint the middle value shape, I work from the left side of my paper to the right, working always from the "bead," or the wet edge. This helps me to connect one object to another, one hue to another.
Finishing Up With a Polished Third Wash
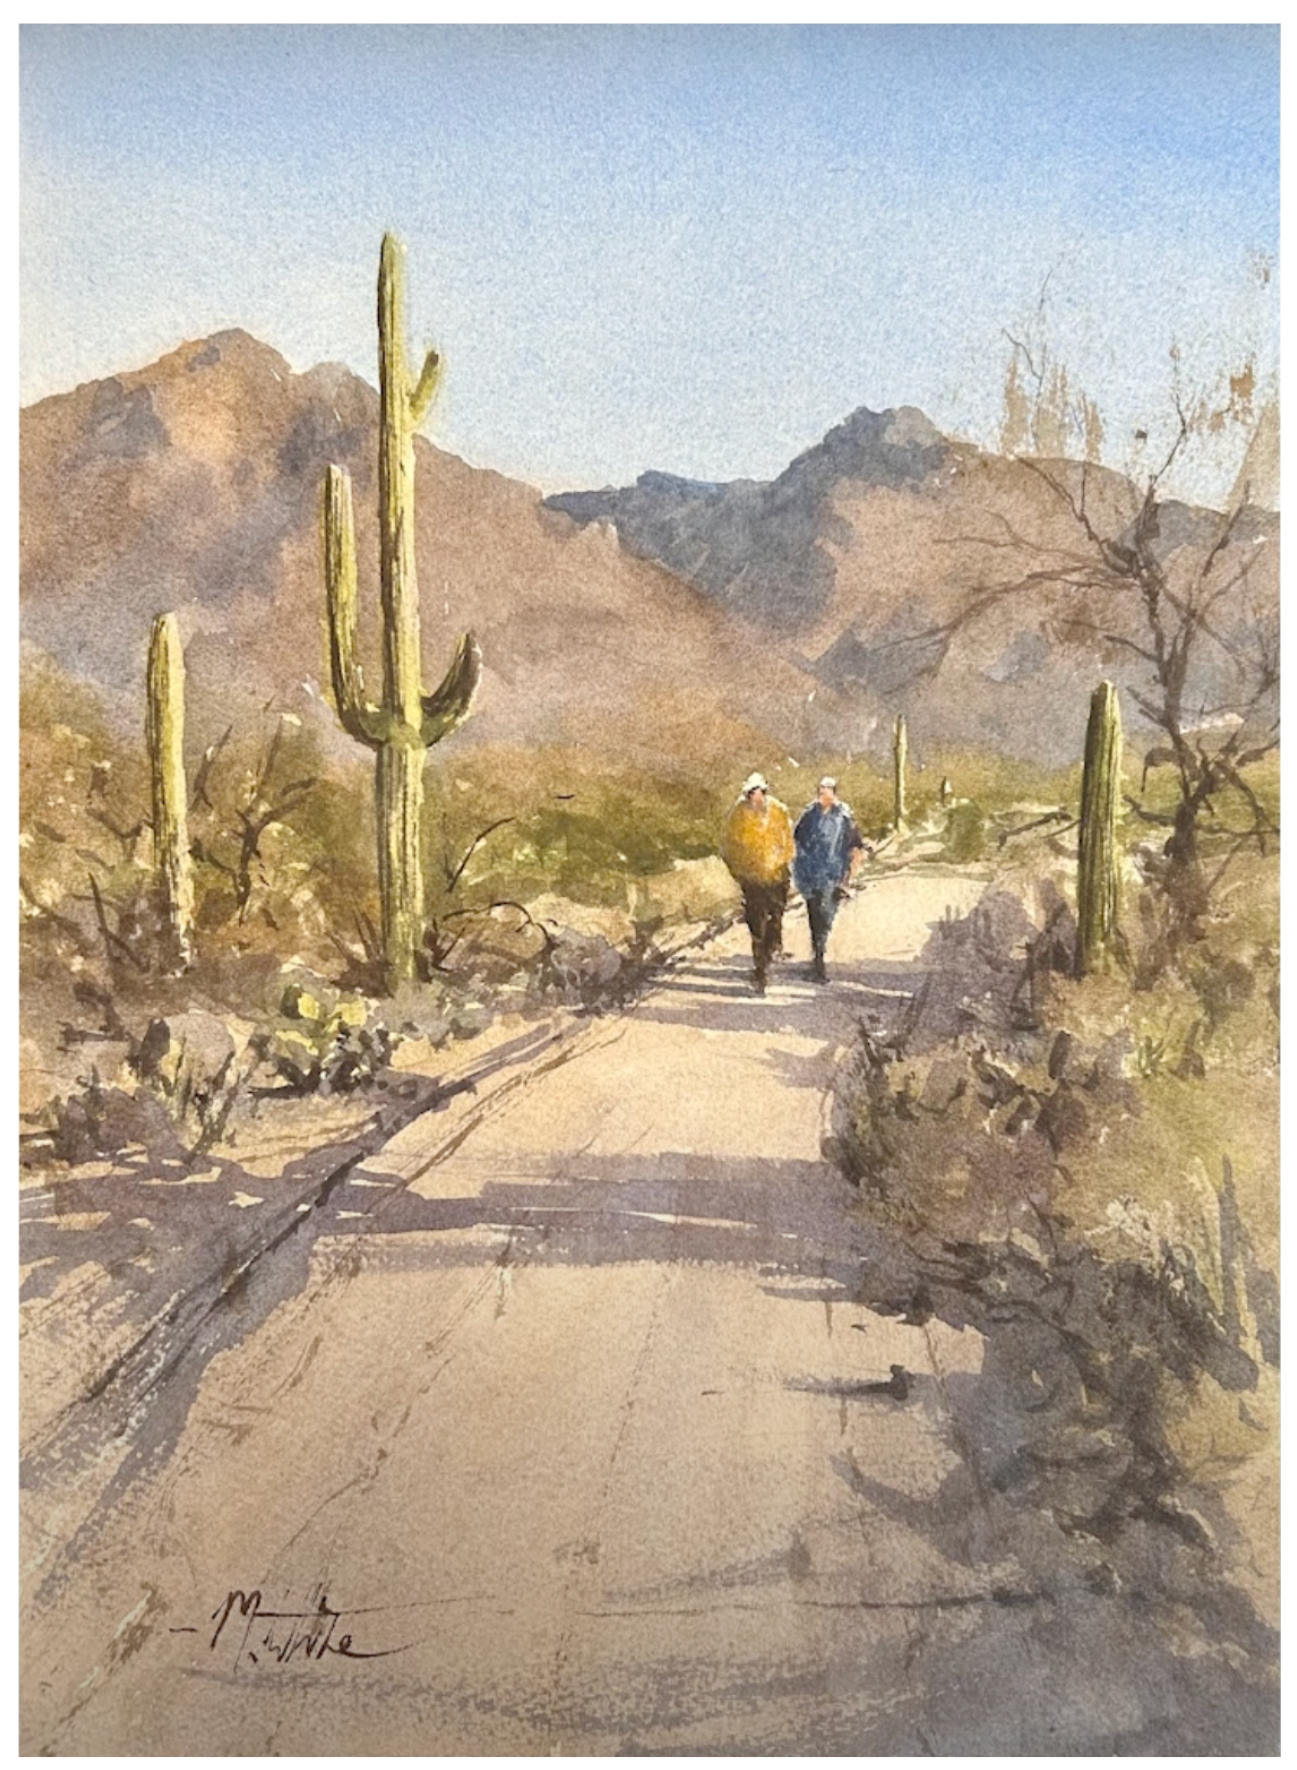
While "connection" was the magic word in the second wash, "distinction" could be the magic word for the third wash. The darks and details you add in this wash should distinguish the objects and give them definition. Note that in the second wash and the third wash, I preserve the values from the previous washes. You need all of the values to achieve the depth and realism you desire.
Related Blogs
All You Need to Know About Layers in Painting Watercolor
Painting Reflections in Watercolor - Three Easy Steps
Watercolor Techniques Tutorial - From Drawing to Final Wash
