Simple Steps To Paint A Watercolor Sky Scene
Sep 22, 2025Every time I fly, I am struck by the incredible privilege that I get to see the Earth from this vantage point. It's gorgeous, and has inspired a few watercolor paintings.
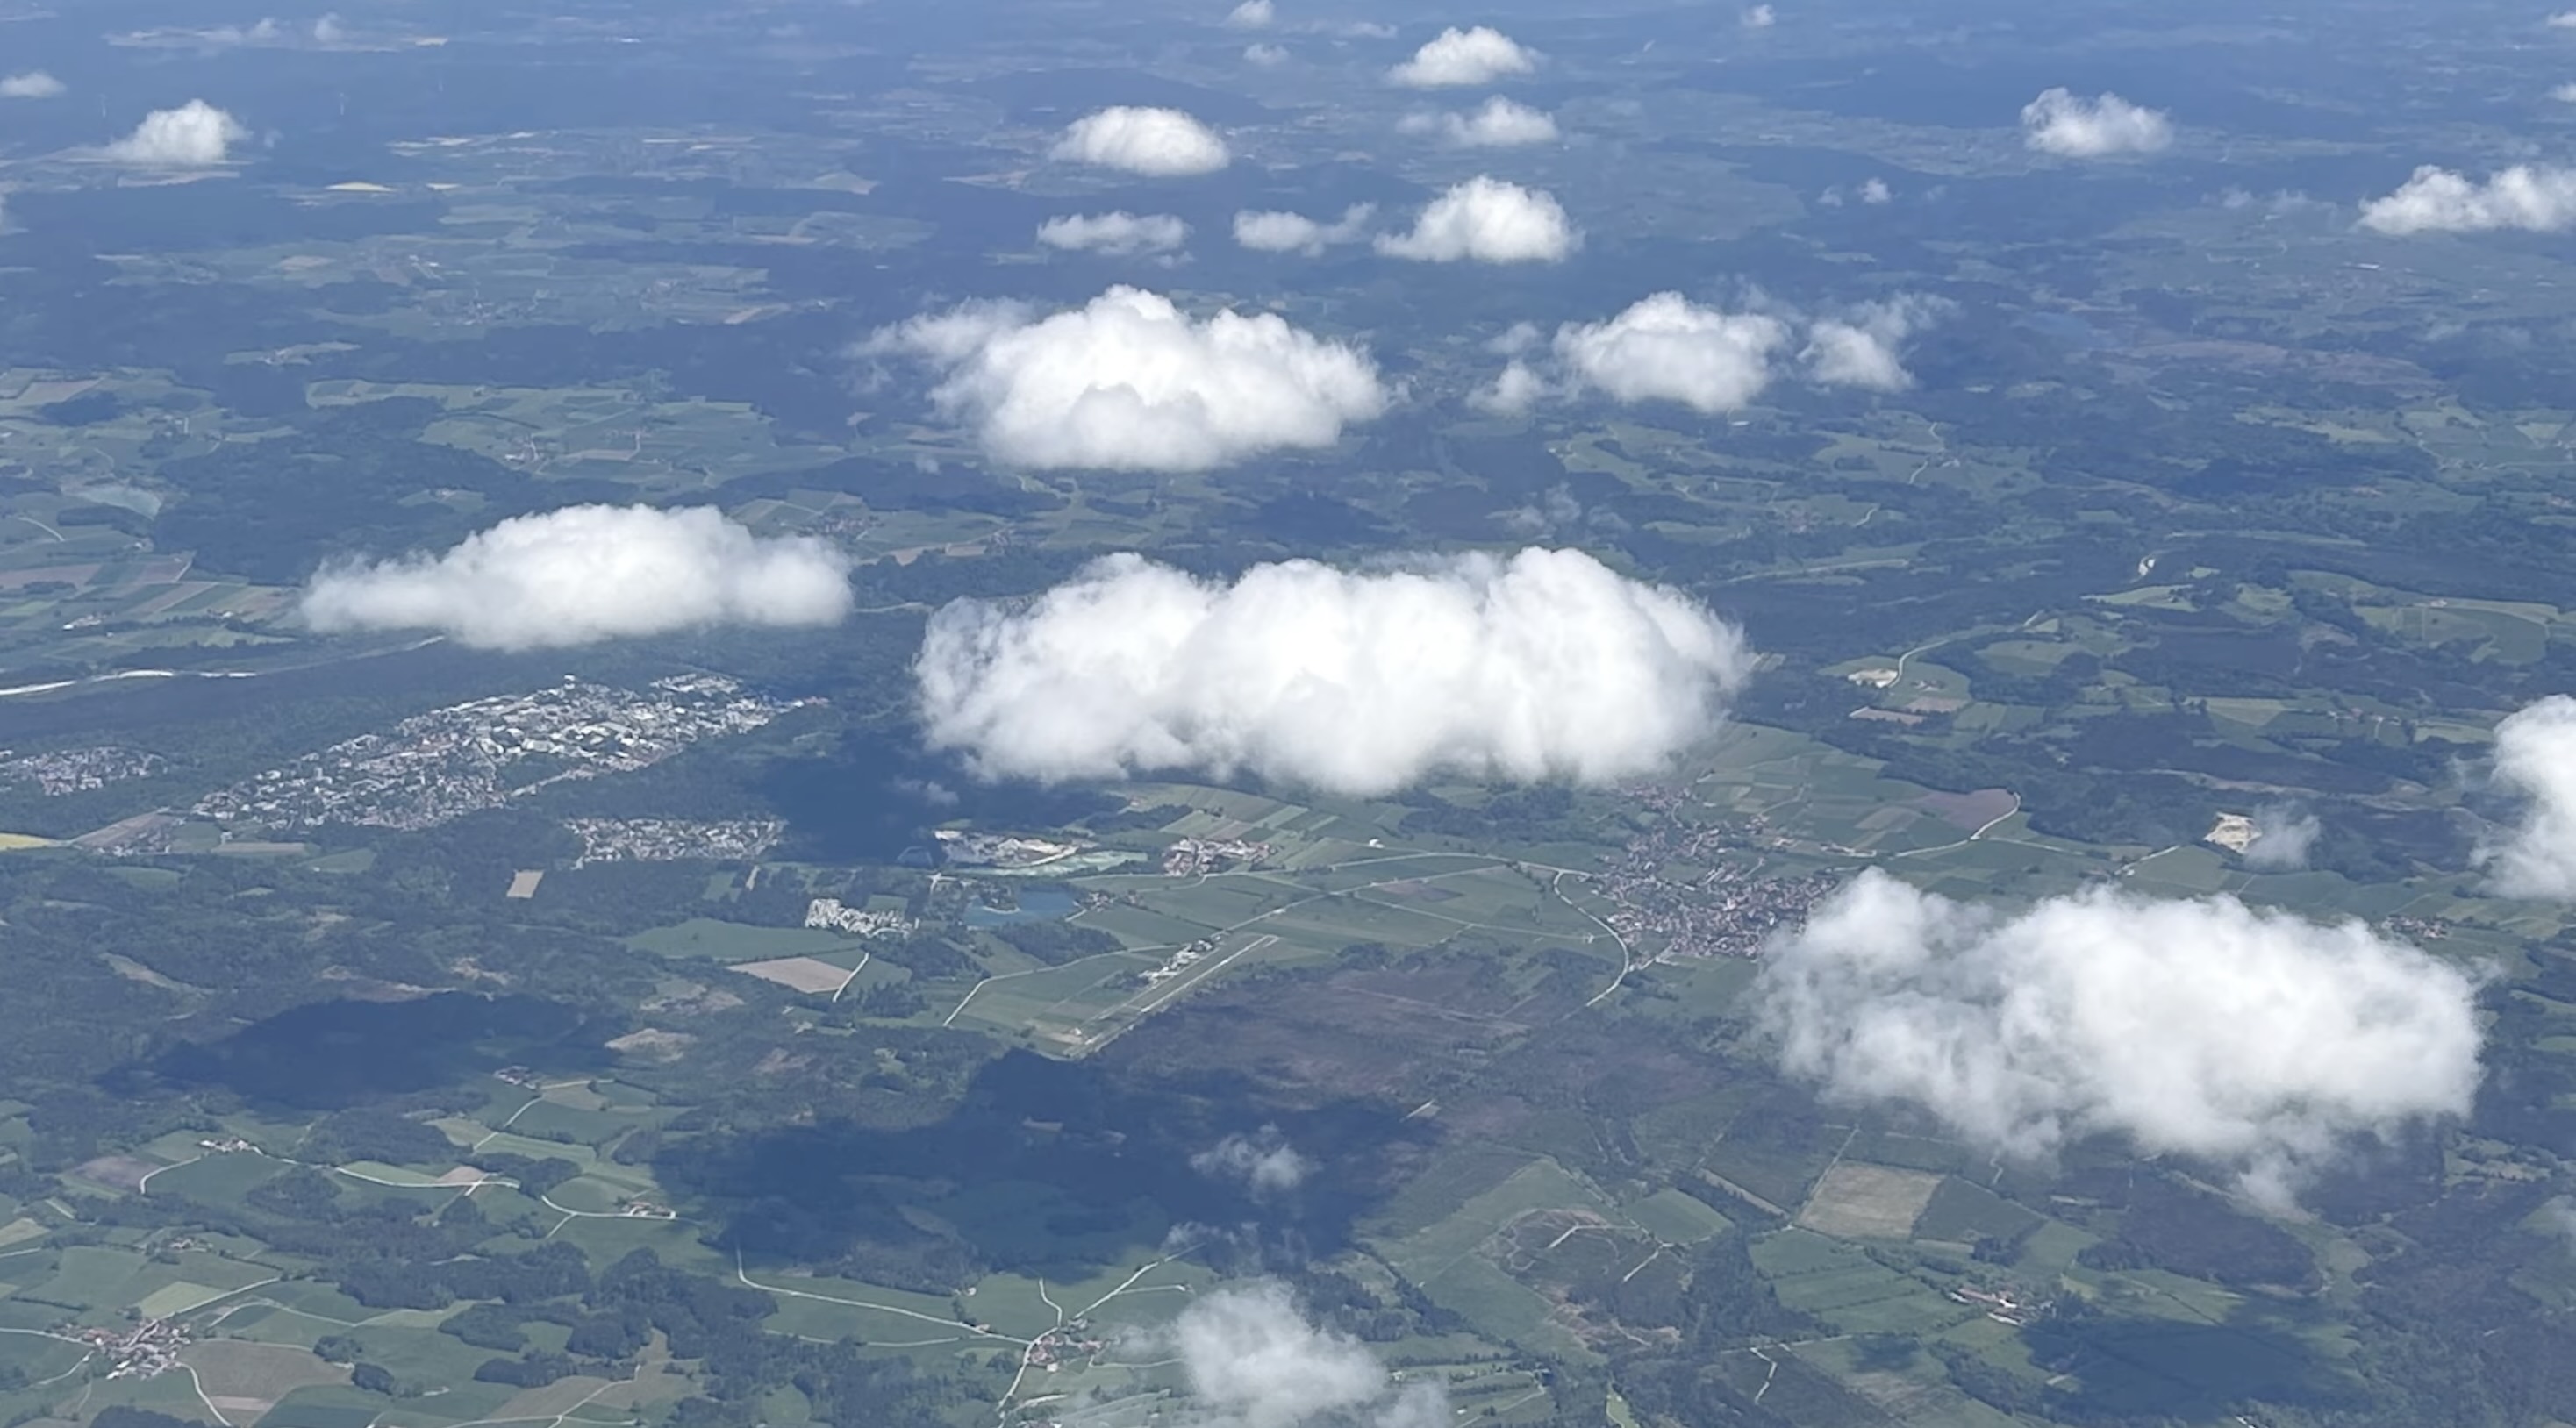
This picture was taken on a flight from Munich back to the United States after my most recent painting retreat in Sicily.
Allow me to walk you through my 3-step process to painting this scene.
Paint This Scene Looking Down on the Earth From Above
First Wash
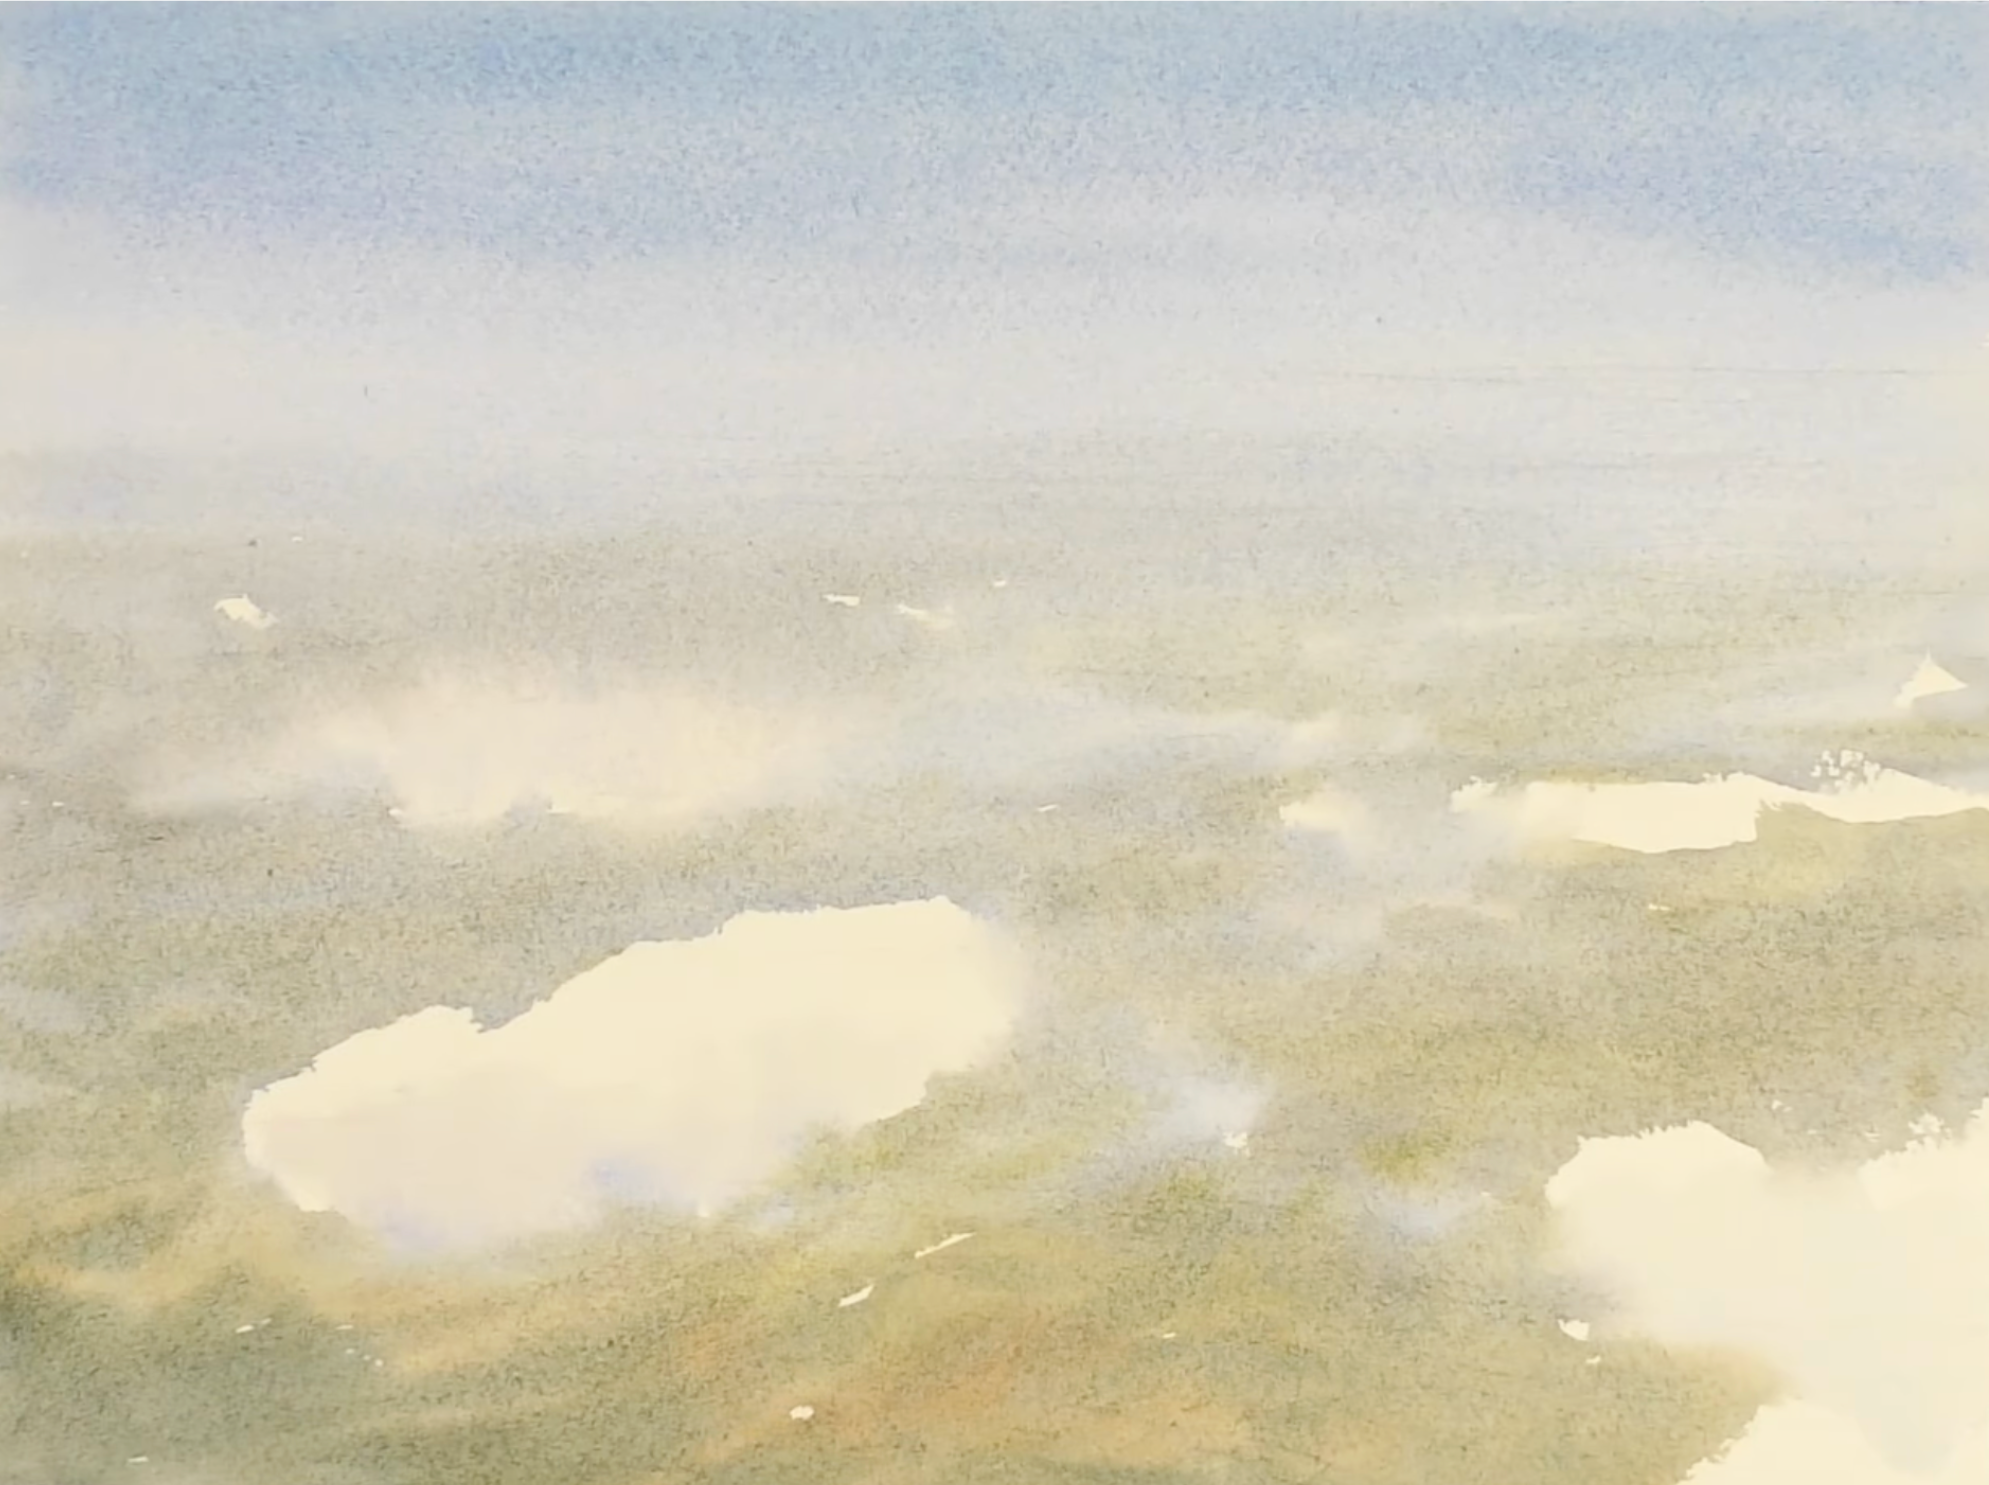
My first wash is focused on the lightest values in my scene. The "finished product" of the first wash can be unsatisfying, as it is muted and murky. But it is absolutely essential. This wash is your only chance to paint those lightest values, as it is nearly impossible to paint light values after painting the darker values.
Note that I did not leave the clouds as white as the paper. I did lay in some light color over the paper to depict the clouds.
Second Wash
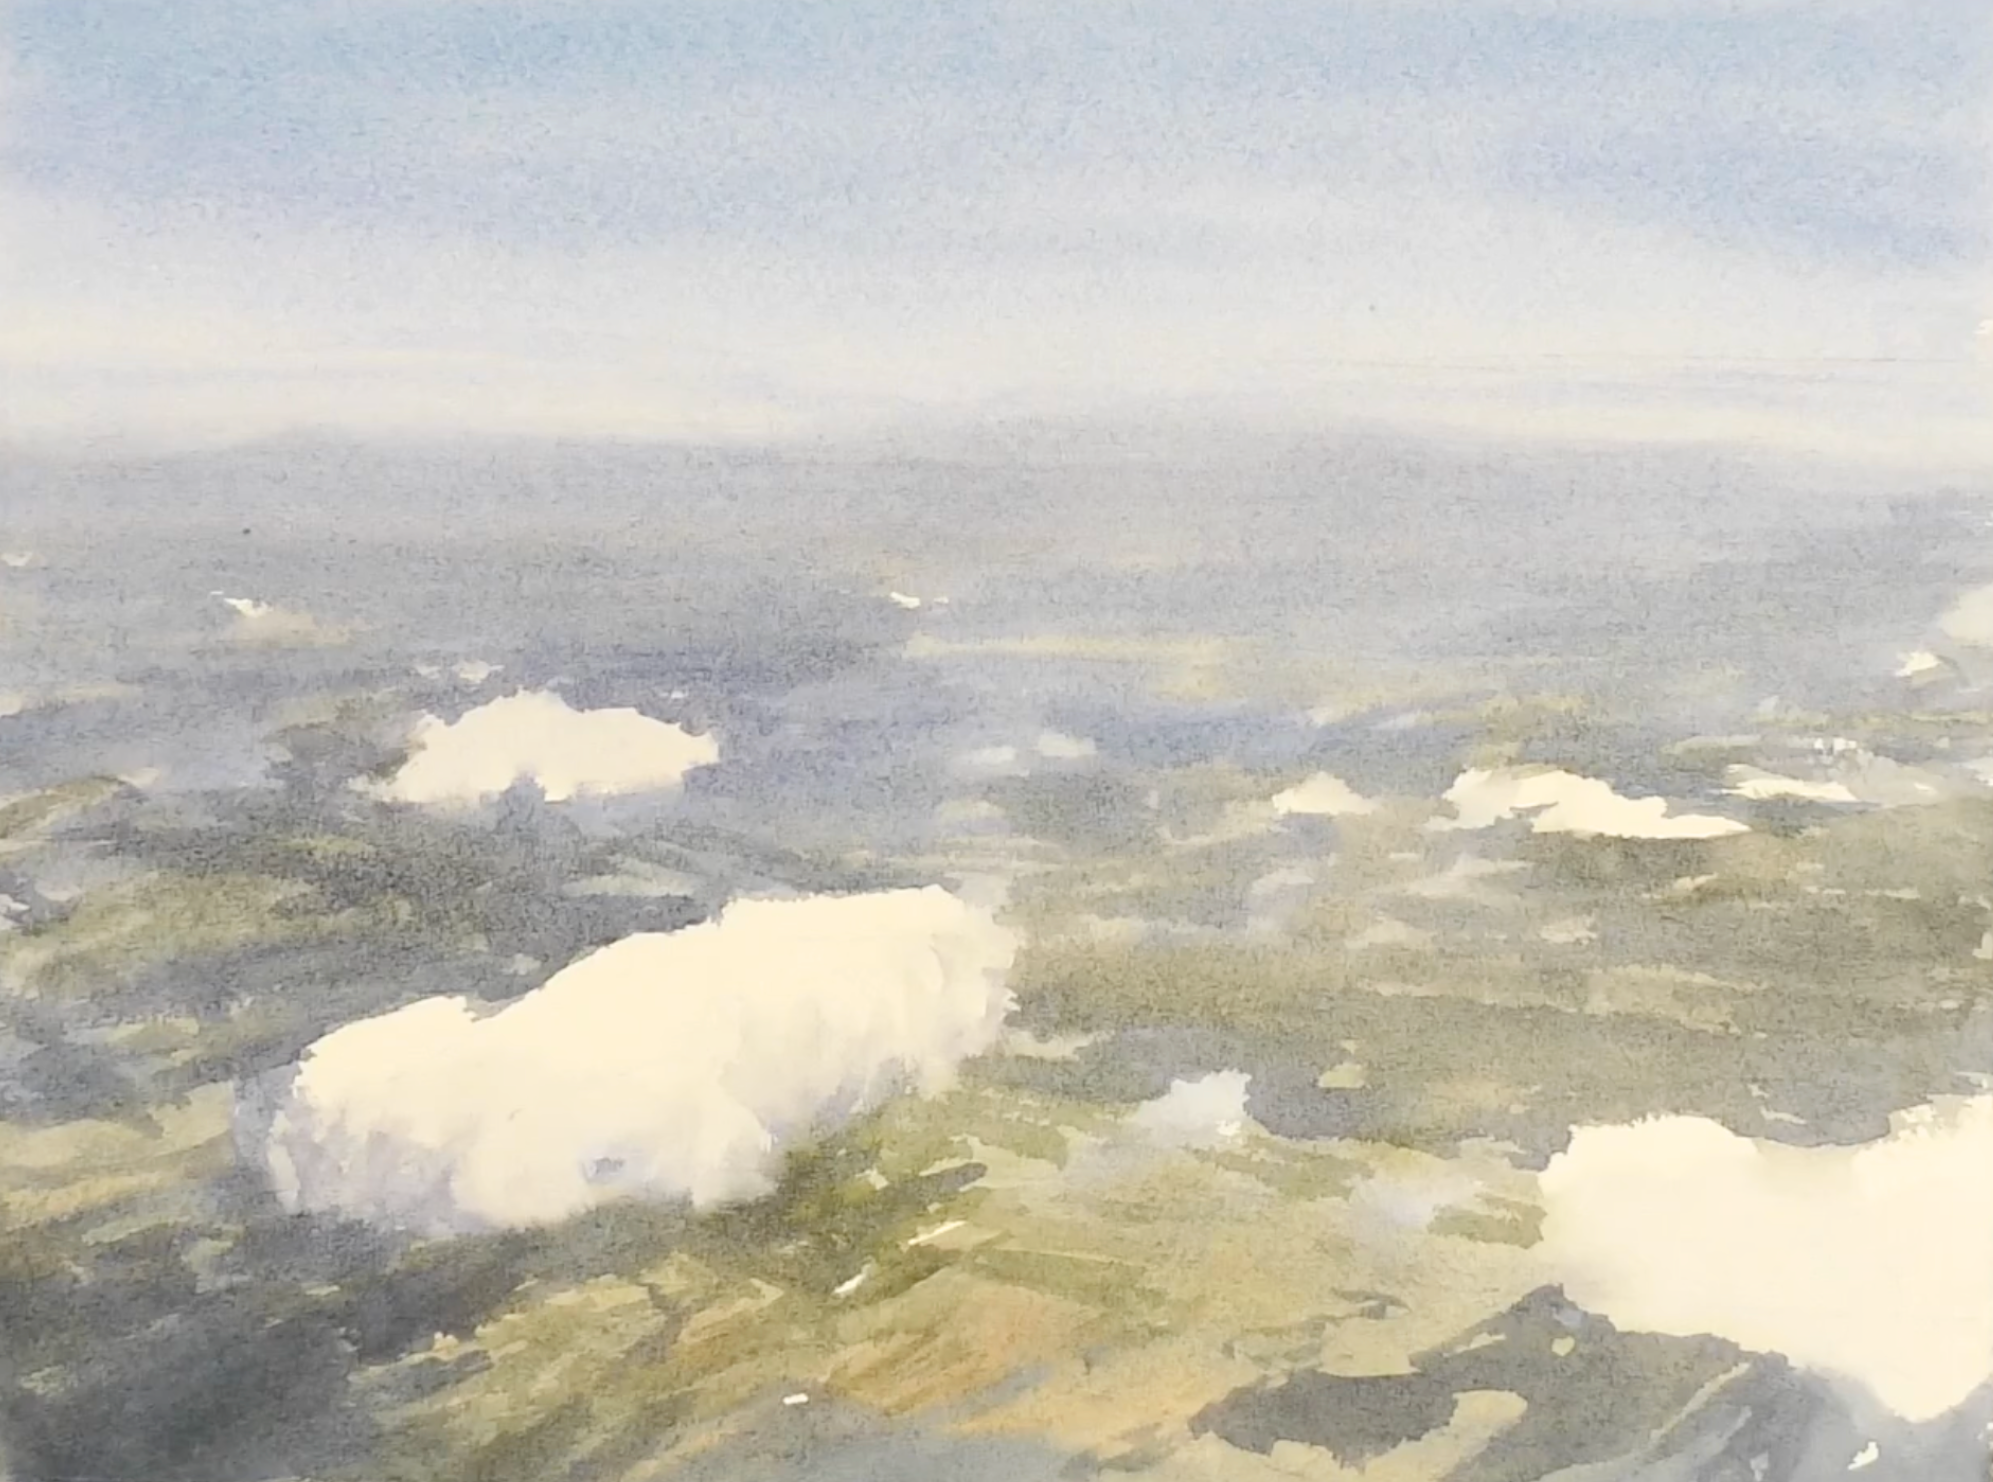
The most important thing to keep in mind for the second wash is the middle value connected shape. For optimal effect, you want your middle values to connect with one other, creating cohesion. Notice how the middle values in this wash seep together instead of create distinct shapes.
Third Wash
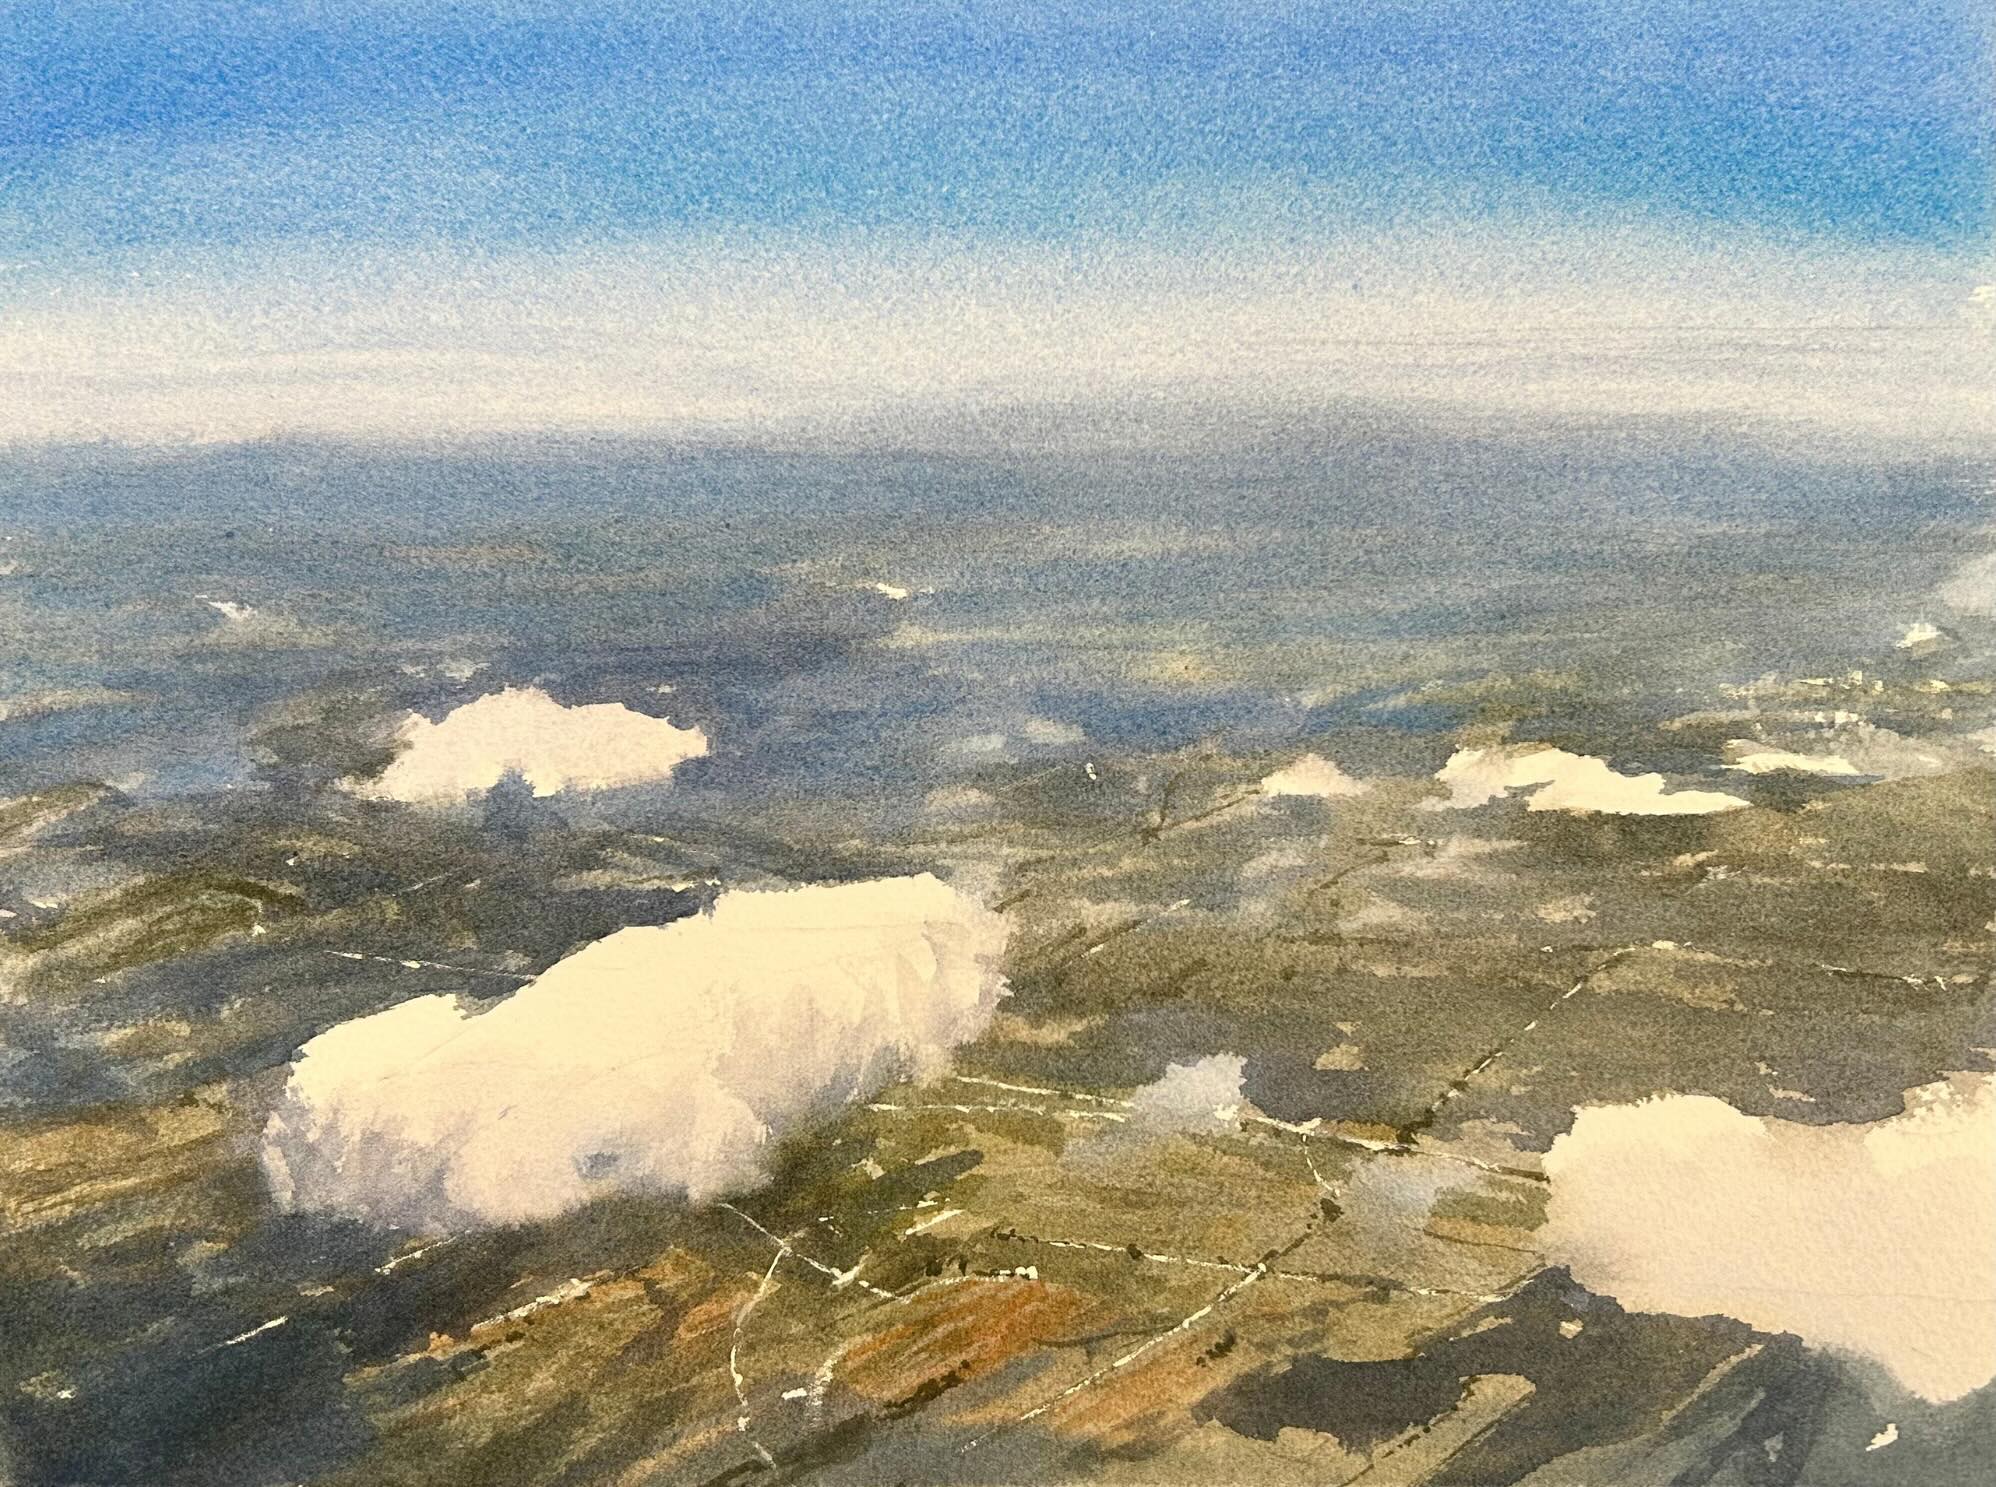
Contrary to the second wash, the focus of the third wash is separation and distinction. Here, you add in the darkest values and precise details that really make the lighter values pop. This wash gives your painting the finished touch it needs.
For a full rendering of this painting and for more detailed instruction, make sure you watch the YouTube video associated with this blog!
Related Blogs
Layers that will Give You Better Results
One Of The Most Effective Watercolor Practices - Painting Clouds
How to Improve Your Watercolor Timing and Paint Mixing Skills: Cloud Tutorial
