How Can I Use Negative Painting to Improve My Watercolors?
Mar 04, 2024The concepts of positive space and negative space exist in your watercolor paintings whether you're aware of them or not.
But you may not be using them to your advantage. They may not be living up to their potential.
Keep reading to learn what negative painting is, how to best use it in your paintings, and what painting techniques could help you take your watercolors to the next level.
All You Need to Know About Negative Painting in Watercolor
In this blog, I am going to:
- Define positive and negative space
- Explain the special relationship watercolorists have with negative space
- Discuss the effect negative painting has on composition
- Outline helpful watercolor techniques for painting negatively
Enjoy this Post? Like this Pin!

Positive Space vs. Negative Space
So let's start with the most basic question related to negative painting - what is it and how does it differ from positive space?
Negative painting refers to the act of applying paint outside or around a shape to define a subject or create the area of focus.
Positive painting, on the other hand, is painting the actual shape directly.
The Special Relationship Watercolor Artists Have With Negative Painting
Often, what watercolor artists don't paint becomes the focal point, the most eye catching element.
A top watercolor strategy is layering different washes on top of each other to create shapes. Whether you're preserving whites or those lighter values as you layer, the shapes you make as you layer on those darker values is creating negative space.
Take these progress pictures for this sky (below).
Notice how the added value in the sky (the blue) is what creates the shape of the clouds (white). I painted this negatively.

What Negative Painting Techniques Should I Use?
Are you ready for the good news?
You probably already know some of the techniques used to paint negative space. Traditional watercolor painting, in many ways, depends on them.
Still, let's go over some of them!
1. Train Your Eye to See in Shapes
Viewing your watercolor subjects as shapes rather than familiar objects can transform the way you paint. When you abandon your preconceived notion of the subject (car, house, figure, etc.) and think more in terms of its shape - and in relation to the other elements in your painting - the realism of your scene improves.
Training your eyes to see in shapes also boosts your ability to identify and recreate shapes made when two or more objects are placed together in a composition.
2. Preserve Lights and Whites
It's a pretty common watercolor technique to preserve the whites of paper, so it's likely you've already encountered this or tried your hand at it. If you've watched me paint a watercolor scene at any point in time, you are definitely familiar with the watercolor method.
Here are some pictures that depict how I preserve light values and whites in watercolor paintings:
First Wash
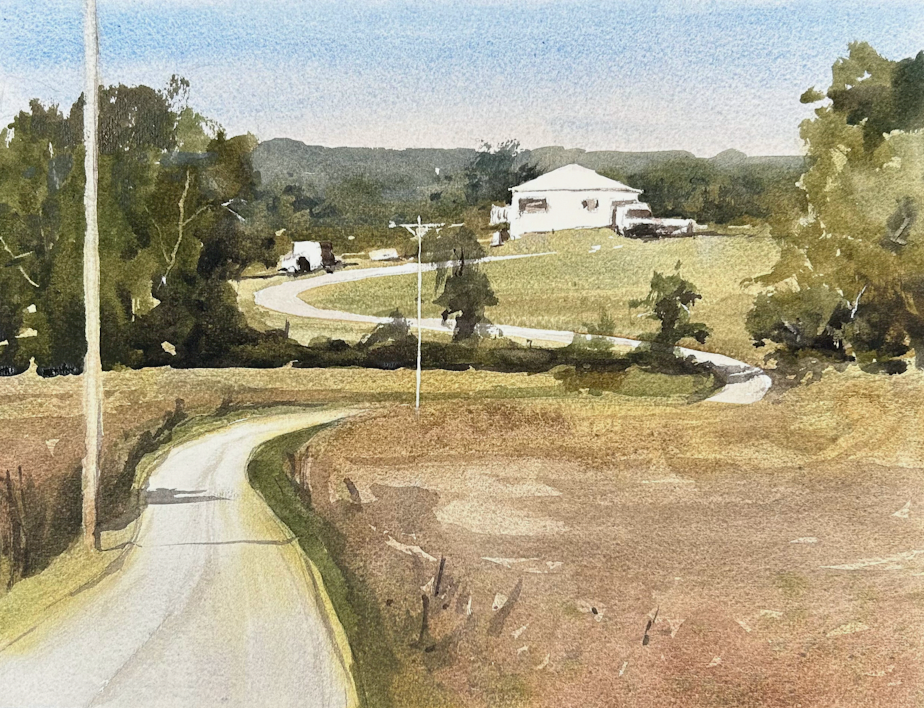
Below is the first wash of this landscape painting. Notice that in this first wash there are examples of negative painting - shapes I created these by painting around them (like the house or van).
In order to preserve the whites of the page as well as I did, I avoided these areas when I wet down the front of my paper. This way the paint didn't spread into those shapes I wanted to keep white. (Note - before I wet most of the front, I first wet down the entire backside of my paper).

Second Wash
Notice the positive and negative shapes I created in this second wash.
Adding the tree line behind the house on the hill allowed me to define the shape of the house. This, as well as preserving the light value of the pole, is an example of negative painting.
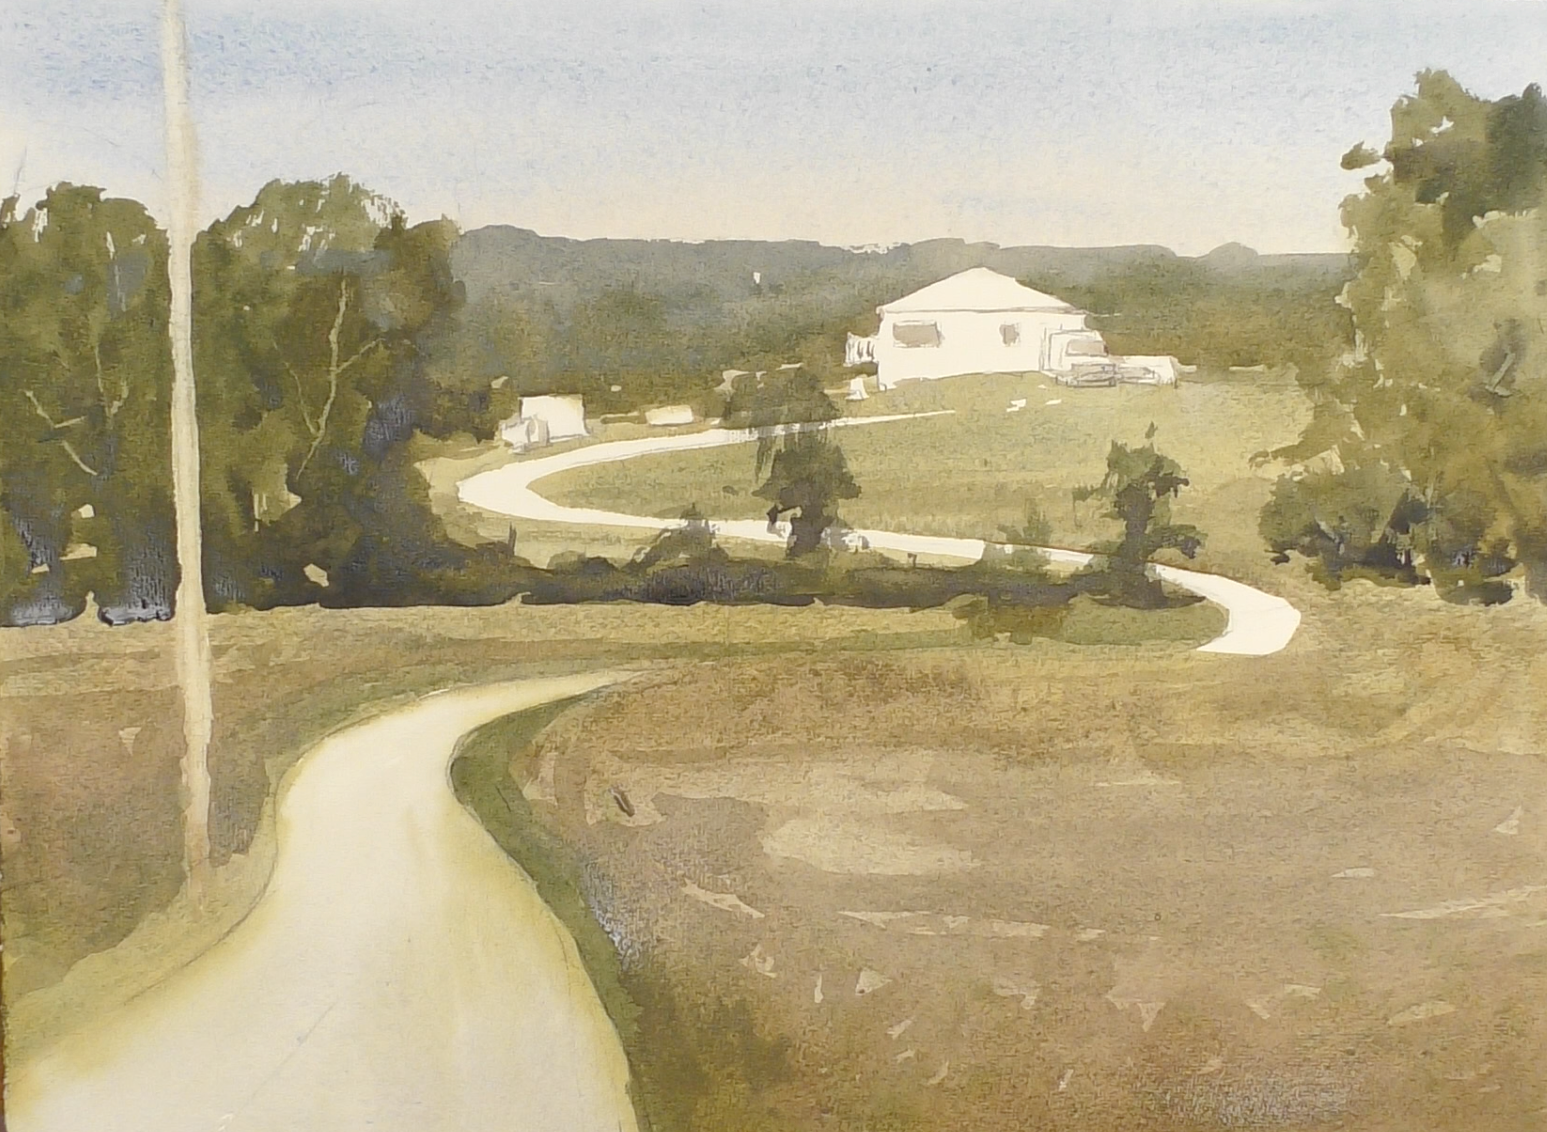
Third Wash
Preserving lights throughout the watercolor painting process is an incredibly useful negative painting technique for watercolor artists. The final result, after adding all the positive shapes, darks, and details, demonstrates its power.
For more explanation on how to create a landscape like this one, watch this free watercolor tutorial.
3. Strategically Implement the Wet-into-Wet Method
When I paint in watercolor, I use the wet-into-wet method, which means I wet down my paper and allow pigments to mix throughout the process. This gives watercolor scenes nice, fluid, soft edges and allows pigments to mix nicely on the paper.
I typically wet down both sides of my paper. However, when there is a part of my watercolor scene where I want to preserve the stark white of the paper, I do not wet the front of the paper in this area. This way, when I apply paint onto the paper, the pigment flows only onto the wet area and protects that dry area from absorbing any paint.

Related Blogs
What is Negative Painting and Why is it a Crucial Skill in Watercolor Painting?
Watercolor Mastery: Techniques to Preserve Luminosity
How to Create a Large Connected Shape: A Watercolor Tutorial
